Building a Small Form Factor Gaming PC: Fractal Ridge, ASRock B620I, AMD 7600, and More
Step-by-step guide to building a powerful and compact SFF gaming PC using the Fractal Ridge case, ASRock B620I motherboard, AMD Ryzen 5 7600, and more. Learn about component selection, assembly tips, Windows 11 setup, and optimizing your mini gaming rig for performance and portability.
Building a compact and powerful gaming PC is an exciting project, especially when you focus on getting the right components to provide both performance and efficiency. In this article, we’ll walk through the process of assembling a Small Form Factor (SFF) gaming PC using the following components:
- Fractal Ridge Case (1)
- ASRock B620I mITX Motherboard (1)
- AMD Ryzen 5 7600 CPU (1)
- G.Skill Flare X5 DDR5 - 32GB RAM Kit (1)
- Corsair SF750 PSU (1)
- Noctua NH-L12S CPU Cooler (1)
And some parts I still use from my old PC
- Gainward GTX 1070 Ti
- Samsung 990 EVO NVMe M.2 SSD 2 TB
Additionally, we’ll discuss how I set up Windows 11, configured automatic login, and used a debloat script to optimize the OS. Lastly, I’ll explain how I made Steam start automatically in Big Picture Mode for a seamless gaming experience.
Why Choose a Small Form Factor PC?
Small Form Factor (SFF) builds are perfect for users who want powerful hardware packed into a compact space. This type of build is great for gaming, living room PCs, or even as a portable solution for LAN parties. The compact size makes it easy to move the system around while maintaining powerful performance.
Choosing the Components
Let’s look at the selected components and why they’re ideal for a small gaming PC.
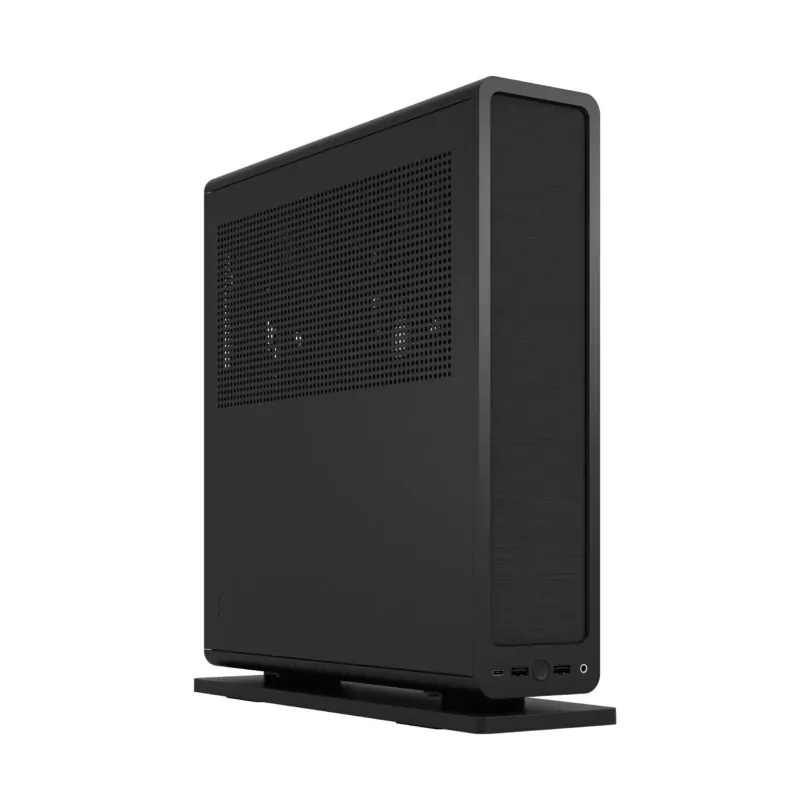
1. Fractal Ridge Case
The Fractal Ridge (1) is a compact, minimalist case that supports high-performance components in a small form factor. It can accommodate an ITX motherboard, a powerful GPU, and a variety of cooling options, making it a great choice for a high-performance yet space-efficient build.
2. ASRock B620I mITX Motherboard
The ASRock B620I mITX motherboard (1) is a compact yet feature-rich option for building a gaming PC. It’s equipped with DDR5 support, PCIe 5.0, and high-quality VRMs for stable power delivery. This motherboard is well-suited for AMD’s Ryzen 7000 series and provides the performance needed for gaming and multitasking.
3. AMD Ryzen 5 7600 CPU
The AMD Ryzen 5 7600 (1) is a 6-core, 12-thread processor that offers excellent performance for gaming and productivity. It features AMD’s latest Zen 4 architecture, which provides better performance-per-watt compared to previous generations. Its performance, combined with efficiency, makes it an excellent choice for a gaming PC.
4. G.Skill Flare X5 - DDR5 - 32GB RAM
The G.Skill Flare X5 (1) DDR5 RAM kit is a solid choice for gaming and multitasking. With 32GB of capacity and fast speeds, it provides enough headroom for modern games, content creation, and general multitasking. DDR5 memory also provides higher bandwidth and improved efficiency, making it ideal for gaming. The low profile layout also makes sure the RAM fits under the CPU cooler.
5. Corsair SF750 PSU
The Corsair SF750 (1) is a powerful SFX PSU with a compact form factor that provides plenty of power for small form factor builds. This 750W PSU is efficient and provides more than enough power for the components in this build, including a high-end GPU.
6. Noctua NH-L12S CPU Cooler
The Noctua NH-L12S (1) is a low-profile CPU cooler that provides excellent thermal performance for small form factor builds. It’s ideal for keeping the AMD Ryzen 5 7600 cool while maintaining a compact profile that fits in tight spaces.
Assembling the PC
1. Preparing the Case
Start by unboxing the Fractal Ridge case and ensuring that all components are compatible. The case comes with sufficient space for an ITX motherboard and a full-length GPU.
- Install the motherboard standoffs and ensure that the PSU area is clear and ready to mount the Corsair SF750.
- Attach the I/O shield to the back of the case.
2. Assembling the ASRock B620I mITX Motherboard
You need to mount the AMD Ryzen 5 7600, the Noctua NH-L12S Cooler and the G.Skill Flare X5 DDR5 RAM in the following order on the ASRock B620I mITX motherboard before installing the motherboard into the case:
- Install the Noctua NH-L12S mounting hardware on the motherboard.
- Put the AMD Ryzen 5 7600 into the AM5 socket.
- Put the G.Skill Flare X5 DDR5 RAM into the motherboard’s RAM slots. Make sure the RAM sticks are fully seated and locked into place.
- Carefully place the Noctua NH-L12S (with the fan attached in low profile mode) on the mounting hardware/CPU. Do not forget to put cooling paste on the CPU!
3. Installing the ASRock B620I mITX Motherboard
Carefully place the ASRock B620 ITX motherboard into the case, aligning the ports with the I/O shield. Secure the motherboard with screws.
4. Installing the Corsair SF750 PSU
The Corsair SF750 PSU is a compact SFX power supply that fits perfectly into the Fractal Ridge case. Mount the PSU securely into its designated area and connect the necessary power cables to the motherboard and cooler.
5. Installing the GPU
If you are installing a dedicated GPU, make sure it fits in the available PCIe slot on the motherboard. Secure it using the bracket screws.
6. Cable Management
Due to the small form factor, managing cables can be tricky. Use the provided cable ties and cable management channels to keep the cables tidy and ensure good airflow.
Setting Up Windows 11
After assembling the PC, it’s time to install Windows 11. Here’s how I configured it for gaming:
1. Install Windows 11
- Install Windows 11 by creating a bootable USB drive and booting into the installer. Follow the on-screen instructions to complete the installation process.
2. Using the Debloat Script
To optimize Windows 11 for gaming and remove unnecessary bloatware, I used a debloat script from Raphire’s GitHub repository. This script removes unnecessary features and pre-installed software, improving performance and reducing distractions.
Run the following commands in PowerShell after downloading the script:
1
2

Set-ExecutionPolicy Bypass -Scope Process -Force;
iex ((New-Object System.Net.WebClient).DownloadString('https://raw.githubusercontent.com/Raphire/Win11Debloat/master/Win11Debloat.ps1'))
3. Enable Automatic Login
For convenience, I configured Windows 11 to automatically log into my user account. This is done through the User Accounts settings:
- Open Run (Win + R), type
netplwiz, and press Enter. - In the window that appears, uncheck the option “Users must enter a user name and password to use this computer.”
- Enter your password and confirm.
If you use a local-only account (without a Microsoft account), Windows 11 may block registry-based automatic logon unless this security flag is disabled first:
- Press Win + R, type
regedit, and press Enter. - Navigate to
HKEY_LOCAL_MACHINE\SOFTWARE\Microsoft\Windows NT\CurrentVersion\PasswordLess\Device. - Double-click the DWORD DevicePasswordLessBuildVersion.
- Change Value data from 2 to 0 and click OK.
4. Set Steam to Start in Big Picture Mode Automatically
To make sure Steam starts automatically in Big Picture Mode (perfect for a gaming setup), I added it to the startup list and configured it to launch in Big Picture Mode by default:
- Open Steam and go to Settings > Interface.
- Enable Start Steam in Big Picture Mode.
- Add Steam to the startup list by typing
shell:startupin the Run dialog (Win + R), then adding a shortcut to the Steam executable.
Final Thoughts
Building a small form factor gaming PC with the Fractal Ridge, ASRock B620I mITX, AMD Ryzen 5 7600, and Noctua NH-L12S cooler results in a compact, powerful, and efficient machine that delivers great performance for gaming and other tasks. Windows 11, configured with a debloat script, automatic login, and Steam Big Picture Mode, provides a streamlined, console-like experience.
The compact size of the build, combined with powerful components, allows for a great gaming setup that fits almost anywhere, whether in your living room, a dedicated gaming space, or even as a portable gaming rig.
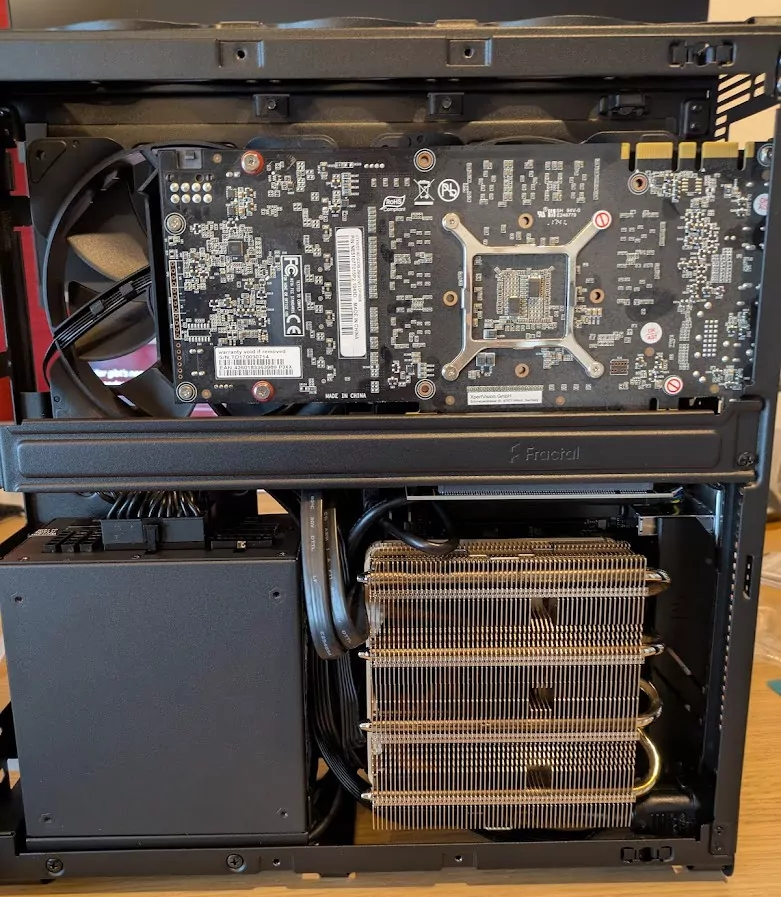
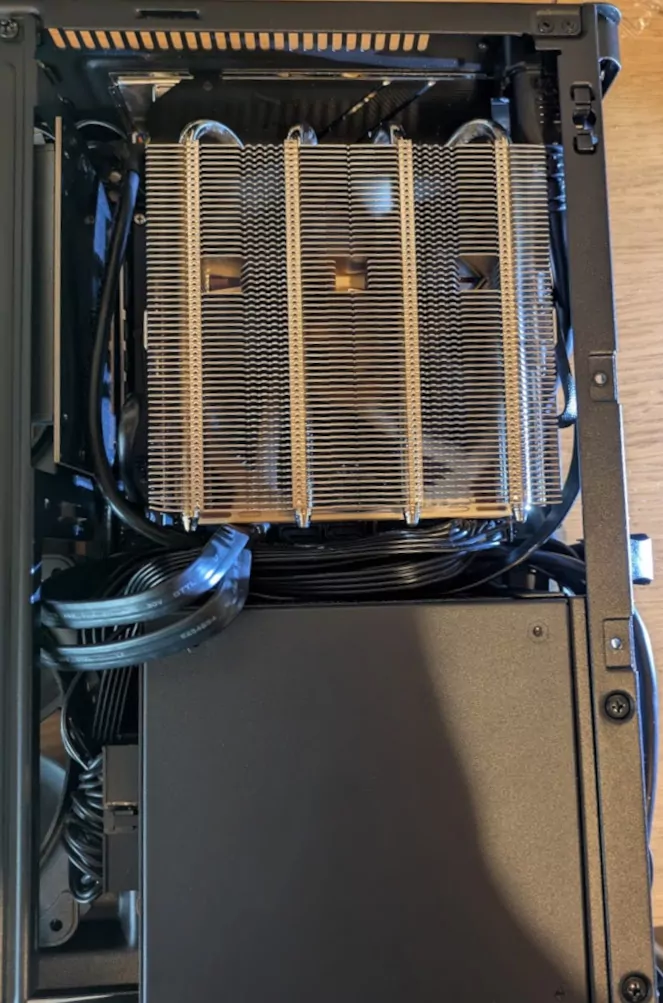
Here are some images of my completed build: