For a new project we had the requirement to attach the classification system to entries from a Z-table. The table structure looks like (for easier understanding I’ve stripped out all field but the primary key):
1. Z-table definition
Table: ZPLANNING_BATCH
- Fields
- MANDT (MANDT)
- ZZBATCH_ID (ZPLANNING_BATCH_ID)
Data-Element:
- ZPLANNING_BATCH_ID:
- Domain: ZPLANNING_BATCH_ID
Domain:
- ZPLANNING_BATCH_ID
- Data type: NUMC
- Length: 10
- Conversion Exit: Alpha
- Value Table: ZPLANNING_BATCH
2. Create an object key for your Z-table
After creating the table, you need to go to the customizing (transaction SPRO) and choose
Cross-Application Components -> Classification System -> Classes -> Define Object Keys.

Here you can create a new entry for your Z-table and enter all needed values (transaction code for maintaining the objects from your table, the table itself, a text table and the key fields)
If you have entered key fields which are not SAP standard fields (like ZZBATCH_ID from the example above), you have to append these fields to the structure RMCLF (see the SAP note 2419619).
3. Adding object table
You can add an object table either via the transaction O1CL or SPRO (Cross-Application Components -> Classification System -> Classes -> Maintain Object Types and Class Types).
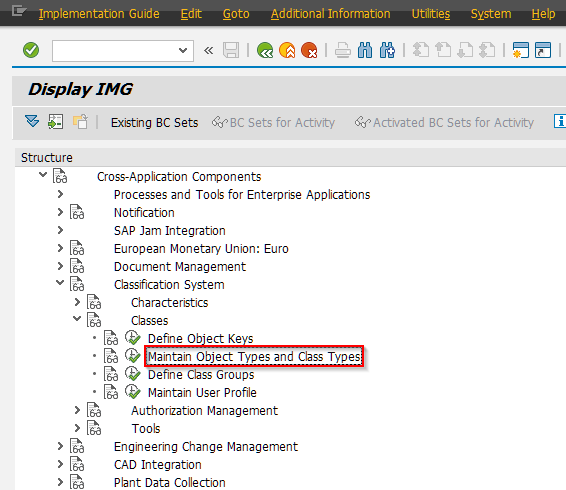
Add a new entry for the node Object Table, using your Z-Table name, a description and all needed screens. Mine looks like:
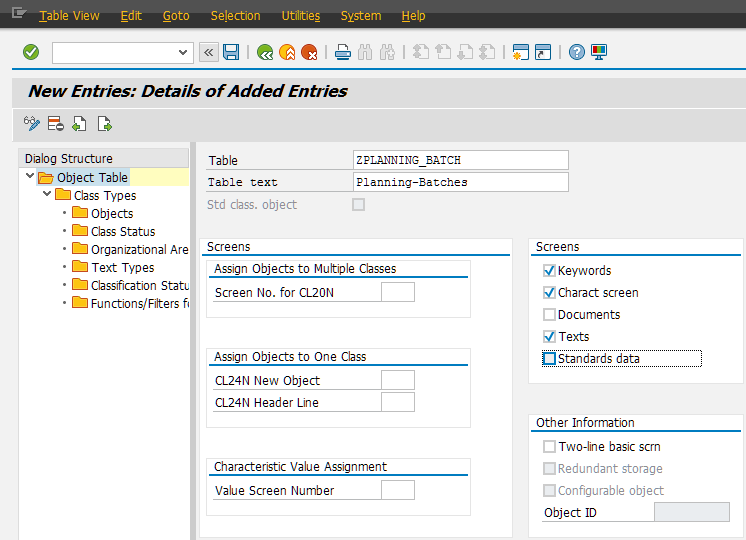
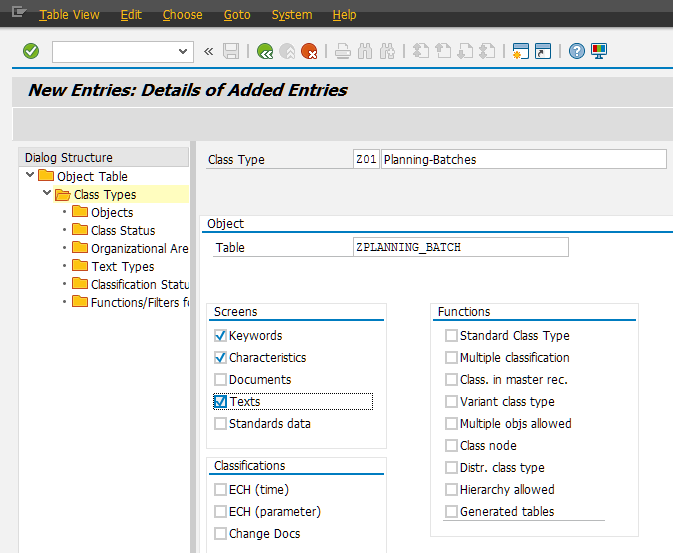
4. Add a new class type
Using the same transaction as above you can add a new class type for your Z-table. Simply choose the entry you’ve created in #3, select the node Class Types and add a new entry. In this screen you may enter the name of the class type, the object table and all wanted screens:
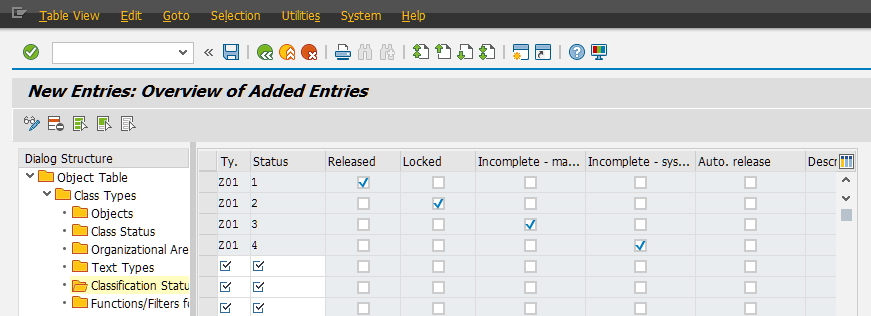
5. Maintain the Class/Classification Status
Last but not least you need to maintain a classification status before you can save your changes. You can add this under the nodes Class Status and Classification Status and enter the status objects as you wish. I used the following values:
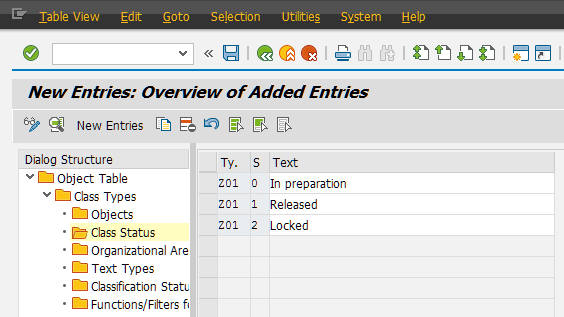
Details of every status for completeness:
- Status 0 (In preparation)
- Class maint. - checked
- Status 1 (Released)
- Class maint. - checked
- Classification - checked
- Selection - checked
- Default status - checked
- Status 2 (Locked)
- Class maint. - checked
- Selection - checked
6. Creating the Function Module OBJECT_CHECK_[object type name]
Before you can use classification for your objects, you need to create a function module with the name OBJECT_CHECK_[object type name]. This function module is dynamically called, so make sure the name matches with your object type name.
To create this module, I would suggest you to copy an existing one like OBJECT_CHECK_MARA and adopt this copy to your need. Just make sure you don’t alter the interface of the function module!
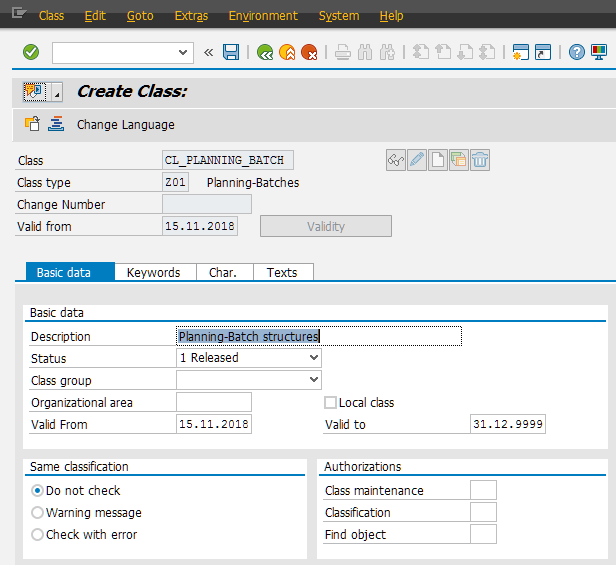
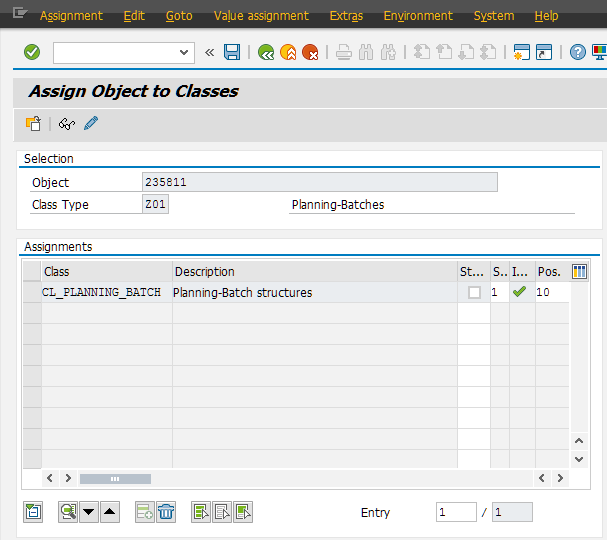
After you have followed this instructions, you should be able to create a class for your class type (transaction CL02) and classify objects with the transaction CL20N: